Command-line Interface (CLI)
To launch unMessage’s CLI, pick any name you wish to use and call it with:
$ unmessage-cli -name <name>
Tor is launched and if this is the first time you use that name, your Onion Service and Double Ratchet keys are created and you are ready to receive and send requests to initialize conversations. unMessage displays this bootstrap process:
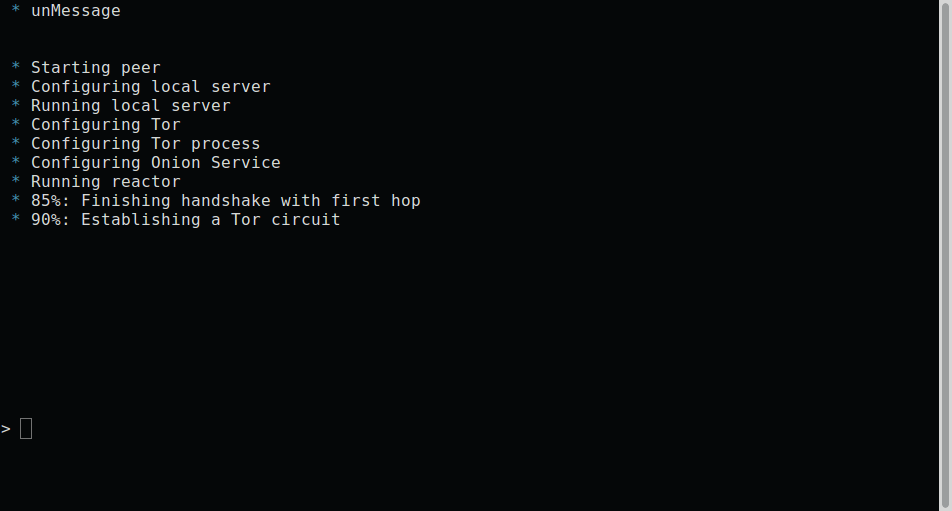
Bootstrap lines
After unMessage is launched, you can call /help to display all the
commands the CLI responds to:
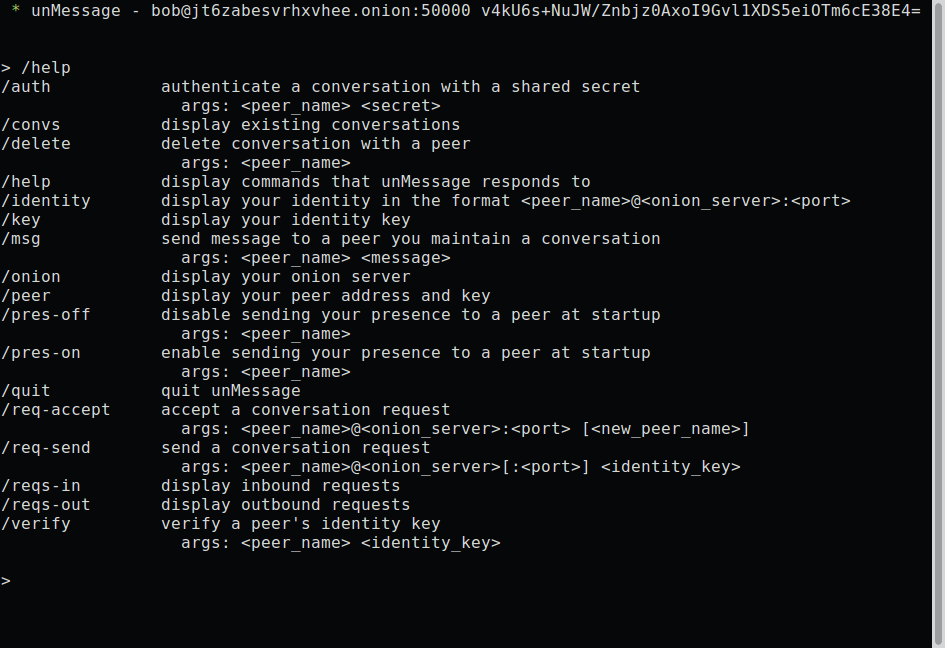
/help command
The /peer, /onion and /key commands can be used to copy
information the other peers need to send you requests. You must share
both your identity address and key:
bob@a7riwene46w3vqhp.onion RefK+9vx3GZpclb/On95iJ1QnxqkUeq/JBYqK5gHFwo=
Sending Requests
Use the /req-send command to send a request, providing the
identity address and key of the peer you wish to contact:

/req-send command
An identity address is provided in the format
<name>@<onion address>, where the <name> is only a local
identifier of the peer and you can pick any name you wish to call
them.
Receiving Requests
Inbound requests are notified, with the information of the peer who sent the request:
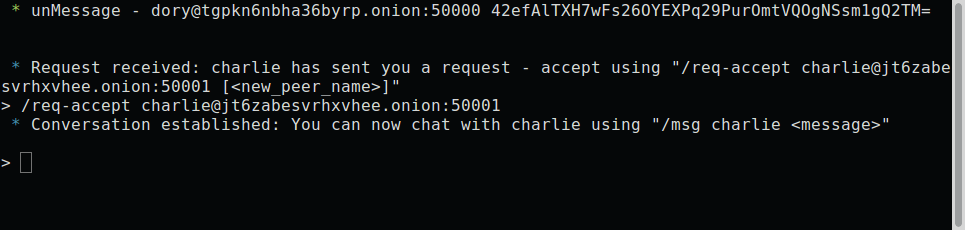
/req-accept command
As mentioned previously, peer names are local and when accepting a request you can pick another one to call them instead of using the one they sent.
Chatting
unMessage diplays each peer you have a conversation with by calling
the /convs command.
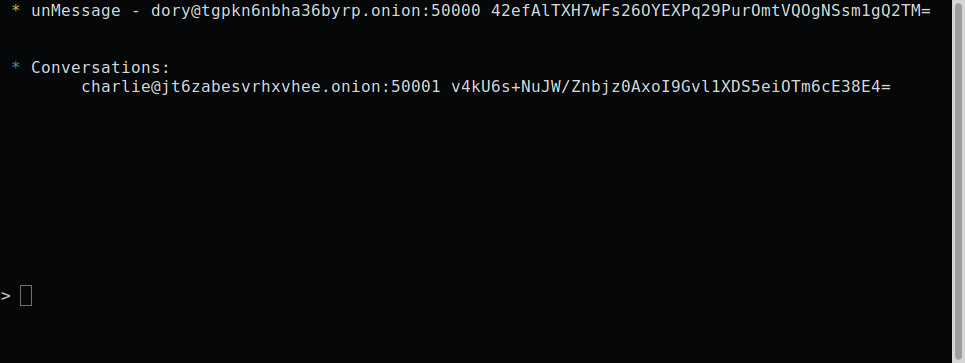
/convs command
To send a message to a peer, use the /msg command:

/msg command
Transmitting Files
unMessage also supports file transfers. Sending a request to transmit
a file can be done with the /file-send command:
/file-send charlie ~/file.txt
The other party will receive a notification with the file name, size
and checksum. It can be authorized to be transmitted with the
/file-accept command:
/file-accept dory DiEjQOChrEorC0iPxrdNenBhiITaobehz5sQSkNnWIY=
The file will be saved by default as
~/.config/unMessage/<your-peer>/conversations/<other-peer>/file-transfer/<original-file-name>.
The command also supports an optional argument for the path to save
the file instead of using the default one:
/file-accept dory DiEjQOChrEorC0iPxrdNenBhiITaobehz5sQSkNnWIY= ~/dory.txt
Once the initiator receives the confirmation, the file transfer is finally initialized and both parties are notified when it is complete.
Notifying Presence
If you wish to notify the peer whenever you go online or offline,
use the /pres-on command and unMessage will start to send them
notifications of these events:

/pres-on command
To disable, use the /pres-off command.
Verifying
If you have some secure communication channel established with the
other peer, ask them for their unMessage public identity key. Use the
/verify command and enter the key:

/verify command
If the key matches, the peer will be verified and now you have established a verified and secure communication channel.
Authenticating
The authentication of a conversation works by prompting both peers for
a secret (which was exchanged through some other secure channel) and
if the secrets provided match, they are sure they are chatting with
the right person. Call the /auth command and provide the secret:
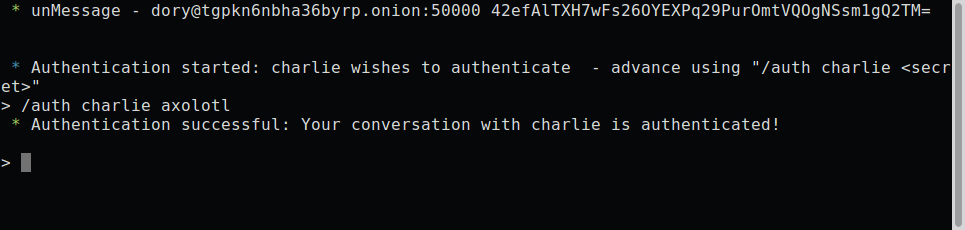
/auth command
An authentication session is created when the secrets are exchanged and is valid until one of the peers disconnect. When it happens, the conversation is not authenticated anymore and a new session must be initialized when the peers reconnect.
Assuming that one of the peers might be an attacker, this process is done with the Socialist Millionaire Protocol by comparing the secrets without actually disclosing them.
Authentication Levels
As noticed, the names of the peers are colored based on the conversation authentication levels:
- Unverified Conversation (red)
- Verified Conversation (green)
- Authenticated Conversation (cyan)
When the conversation is established, its level is Unverified Conversation because unMessage does not know if you are sure that the peer’s identity key is actually theirs.
If you follow the Verifying section, the level changes to Verified Conversation and it persists for as long the conversation exists.
If you follow the Authenticating section, the level changes to Authenticated Conversation and it persists for as long the session exists. Once the session is over, the level drops to the identity key’s verification level: Unverified/Verified.
Important
The Authenticated level is stronger than the Verified level because the former is a short term verification that lasts only until the peers disconnect, while the latter is long term that lasts until the conversation is deleted (manually, by the user). That means that with a short term verification you are able to authenticate the peer at that exact time, while a long term verification means that you authenticated the peer in the past, but is not aware of a compromise in the future.
This feature aims to increase unMessage’s security by identifying an attack that is not covered by the scope of the Double Ratchet Algorithm: compromised keys.
Relaunching unMessage
unMessage remembers the last User Interface and Peer that you used. If you wish to use a shortcut, you may call:
unmessage
Note
unMessage’s CLI is inspired by xmpp-client.